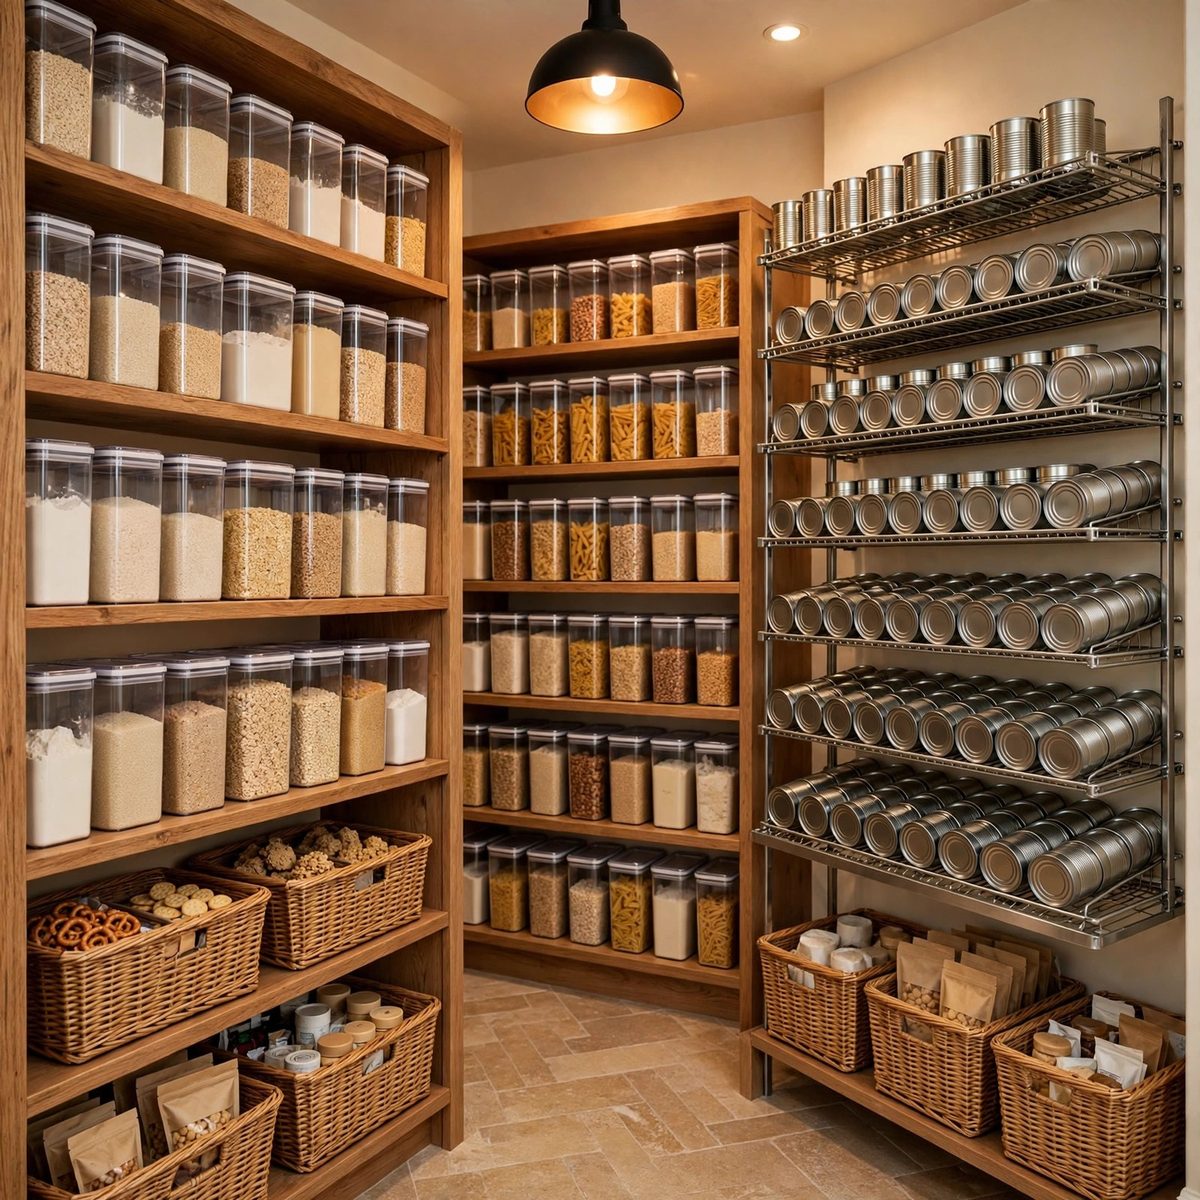
Most pantries get organized once and fall apart within a month — not because the system was wrong, but because it was built for a photograph instead of a household. A lasting pantry system has to survive grocery runs, hungry teenagers, and the reality that nobody puts things back exactly. This guide shows how to build one that holds up.
Why Pantries Fall Apart (and How to Prevent It)
Pantries fail for three predictable reasons. First, the system is too precise — every spice alphabetized, every can facing forward. Precision systems require precision maintenance, and nobody maintains them. Second, categories are unclear — when "baking" and "snacks" share a shelf, everything lands wherever there's space. Third, there's no slack — a pantry at 100% capacity has nowhere to absorb the next grocery run, so new items pile in front of the system and bury it.
The fix is a system built for real behavior: broad categories instead of narrow ones, clear containers that show contents, labels the whole household understands, and 10–15% empty space by design. It won't look like a magazine spread, and that's the point — it will still work in six months.
Step 1: The Full Pull-Out and Purge
Take everything out of the pantry. Every shelf, every corner. Yes, it's disruptive, and yes, it's necessary — you can't organize what you can't see. As you pull items out, check expiration dates and toss anything expired, stale, or that nobody in the household will eat. Be honest about the specialty ingredients bought for one recipe two years ago; they're occupying space that daily staples need.
Wipe down the shelves while they're empty. Then group what remains into broad categories: breakfast, snacks, baking, canned goods, grains and pasta, oils and vinegars, spices, drinks. Don't create more than eight or ten categories — more than that and the system gets fussy. These categories become your shelf assignments.
Step 2: Zone the Shelves by Height and Use
Assign categories to shelves based on how often they're reached for and who reaches for them:
- Eye level (the prime zone): Daily-use items — breakfast, snacks, cooking staples. This is where visibility matters most, so use clear containers and bins here.
- Waist to knee level: Heavy and bulky items — canned goods, large containers, small appliances. Lower shelves handle weight better and keep heavy items from being lifted overhead.
- Above eye level: Backup stock and rarely used items — extra paper towels, holiday baking supplies, the second bag of rice. Use bins here so you can pull the whole bin down instead of reaching blindly.
- Floor level: Bulkiest items — water packs, large bags of pet food, bulk purchases. Nothing here should need frequent access.
- Kid zone (if applicable): One low shelf or bin with kid-approved snacks they can reach themselves. This single move stops kids from climbing shelves or emptying the wrong ones.
Step 3: Decant Dry Goods into Uniform Containers
Decanting — moving dry goods from their packaging into uniform containers — is the highest-impact step in a pantry overhaul. It eliminates half-empty boxes that flop over, makes quantities visible at a glance, and keeps staples fresh in airtight seals. You don't need to decant everything; start with your five most-used dry goods (flour, sugar, rice, cereal, coffee are the usual suspects) and expand from there.
Choose clear containers with airtight snap-lock lids and silicone seals — the seal keeps pantry moths out and staples fresh, and the clear body shows when you're running low. A nesting set in graduated sizes covers everything from baking powder to flour without wasted shelf space. The NeatNest Airtight Food Storage Set, 12 Piece nests by size with white snap-lock lids designed for this exact job. Label each container with its contents — masking tape and a marker work fine, or use a label maker for a cleaner look.
Step 4: Bin the Small Stuff
Small items — snack packs, seasoning packets, tea bags, vitamins — are what make a pantry look chaotic, because they scatter across shelves. Corral them into clear bins, one bin per category. The bin becomes the unit: you pull the whole snack bin out, choose, and slide it back. Nothing drifts.
Use bins with built-in handles so they slide easily, and label plates or label-ready fronts so the household agrees on what lives where. Graduated sizes let you match the bin to the category — small bins for packets, large ones for baking supplies. The OrderlyOak Pantry Organizer Bins, 6 Pack come in graduated sizes with handles and label plates, covering most pantries in one set. Place bins on eye-level shelves where the small stuff is used most.
Step 5: Tame Cans, Spices, and the Under-Sink
Canned goods expire in the back of the shelf because of first-in, last-out chaos. A can dispenser rack fixes this with gravity: new cans load at the top, older ones roll forward. The NeatNest Stackable Can Dispenser Rack uses angled shelves so nothing hides in the back, and stackable designs scale as your stock grows.
Spices need visibility — a single row of jars on a shelf means you buy duplicates of what you can't see. A two-tier stepped rack puts every jar in view. The TidyHaven 2-Tier Spice Rack Organizer holds jars in two stepped rows. Audit spices yearly; ground spices lose potency after about a year, and expired jars are just shelf clutter.
Don't forget the under-sink cabinet — it's pantry-adjacent storage for cleaning supplies in many kitchens. A two-tier rack with sliding baskets works around plumbing instead of fighting it. The OrderlyOak Under-Sink Organizer Rack is designed for that awkward space.
Step 6: Label Everything (Yes, Everything)
Labels are what make a pantry system survive contact with other people. You know that the third bin is baking supplies; your partner, your kids, and your mother-in-law don't. Labels remove the guessing — and the guessing is what breaks systems, because misplaced items are the first step back to chaos.
Keep labels broad ("Snacks," "Baking," "Canned Goods") rather than hyper-specific — broad labels stay accurate as contents shift. A basic label maker is money well spent on the project, but tape and marker work fine to start. Label the shelf edge too if bins ever come out and need to go back to the right spot.
Maintaining the System: The Part Everyone Skips
A pantry system needs about fifteen minutes of maintenance a month. Build these into your routine:
- Grocery-day reset (5 minutes): When you unload groceries, put new items behind existing ones (first in, first out) and pull anything expired to the front for tossing.
- Monthly scan (10 minutes): Check dates on dairy-adjacent dry goods, consolidate half-empty containers, and re-home anything that drifted to the wrong shelf.
- Seasonal audit (30 minutes, quarterly): Pull one zone at a time, toss expired items, and check whether your categories still match how you actually cook. Pantries evolve — the system should evolve with them.
- The shopping-list habit: Keep a running list on the pantry door or your phone. When you take the last of something, add it immediately. This stops both stockouts and panic-buying duplicates.
The one-in-one-out rule applies here too: when you buy a new specialty ingredient, check whether an old one can leave. Pantries grow by accretion — a jar here, a mix there — and the only defense is a habit of outflow to match the inflow.
Common Pantry Mistakes to Avoid
- Buying containers before purging. Measure your actual categories first, then buy. Pre-bought sets often don't match what you own.
- Decanting everything on day one. Start with five staples. Decanting thirty items at once is exhausting and you'll abandon the project.
- No slack space. Leave one shelf or half-shelf empty. A full pantry can't absorb a grocery run without breaking.
- Storing by size instead of category. All the tall items together looks tidy but means baking powder lives next to olive oil. Category first, aesthetics second.
- Forgetting the household. If only you know the system, it dies when you're busy. Labels and broad categories make it everyone's system.
Build it once, maintain it lightly, and the pantry stops being a project and becomes just a room that works. Start with the foundations — bins, containers, and racks — in our Kitchen & Pantry Storage collection.